... I love the Process involved in the act of Creating, of just about anything... it almost thrills me more than the finished work itself... these photos show some of the steps involved in bringing the front of a structureto life...
... click photos to see larger view, if you like...
... the casing and the very old doors (1870, I believe) were hung... the black space surrounding them is covered by heavy tarpaper...
... an overhang has already been mounted across the top covered with white aluminum flashing...
John is beginning the side Pilasters.. building them out so they have depth...
Layers of wood are measured and cut... nail heads being sunk here...
...sturdy attractive bases for the pilasters... the door is still being held closed by a stick.. can't do everything at once... soon...
Then he works his way up to do multiple layers at the top of each side...
... building them out using extra pieces underneath... making each section progressively larger... and not letting any of our scrap wood go to waste...
...attaching the flashing to the top corner
I like it so far...
A little sketch of what we might do to the top of each window on the doors...
.. nailing on the wide dentils under the header... the remaining header space is filled with flat cedar... each board cut on the bevel so any water from storms will drain away ... and not lay and rot the wood.
...three narrow but deep wooden strips were placed in the main header butting up to a raised box that holds the light fixture... the box helps project the light out further over the doorway...
We beveled the sides of recycled boards to create the look of raised panels under the side and front windows..
to compliment the panels John put on the front doors...
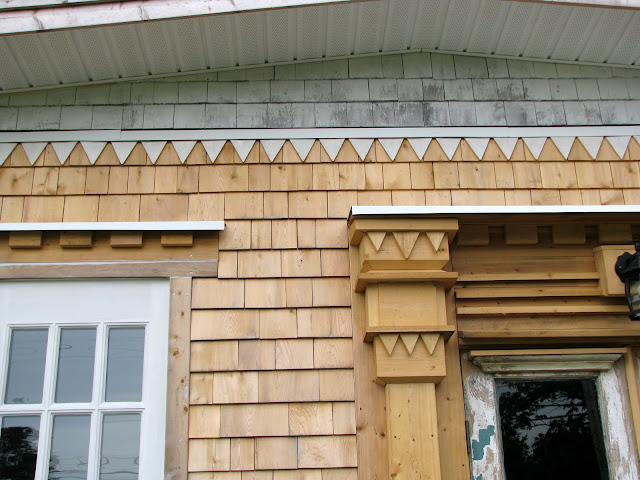
... we added small triangles to finish off the front pilasters...
...top and bottom...
... when certain design elements are repeated, it helps tie it all together...
...and hopefully adds a bit of whimsy and fun...
...starting to paint the top row of triangles that runs along the top of the wall... so it looks like little flags... I am using Olympic Solid Color White Stain... stain doesn't peel... low maintenance!
... the details of the built-up surround makes lovely shadows when the light is at certain angles and levels during different parts of the day......
... finished painting the flags...
...and just started the window trim... I want them to look as one unit ... and be reminiscent of the older architecture of the village...
...detail...
...the windows are done and they have really come to life
I never painted the eave shingles .. as well, I am not painting the sides of the weathered patinated shingles.. I like them that way ... the front shingles are being left to weather to a silver gray... won't take long in this salt air...
oh....... I was very reluctant to start this part... the first few swipes with the paintbrush just made me cringe... but it is hard to paint with your eyes shut...
... no turning back now...
.. ok.. I did it... it's ok... It's Fresh.. I like it... I think it presents the doors quite well... and makes you feel a little special walking through them... like you went somewhere, even if it was only in and out... sort of like a child climbing into a cupboard...
...attached the cast iron bell with ribbons that were hiding in the back of a drawer... from Laura Secord Chocolate boxes that John had given me a few years ago...
...... we put the light back in its place and made sure it worked...
... all done...
These are the same steps taken by us, a few years back, when we created the front door entrance for our home, just up the road Door #4
..Other old doors we had fun with when we built our house..... Door #1... Door #2... Door #3 ...


