Tuesday, December 30, 2014

Steaming Cup of Coffee and A Second Quilt


Early morning sunrise peeking into the kitchen..  I love early morning light... even the air felt renewed.

 ...my favourite coffee  perked in a Moka pot

Ohh la la.. that looks good... perfect way to start the day 

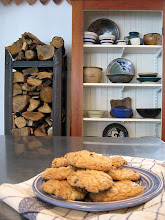
a few sticks in the fire and the day has begun.


 Below are a few designs I made to send off to customers and to post on my FaceBook 
(yes I am on Facebook... kind of a scary place for a Hermite but not as scary as it was 2 years ago when I initially tried it and then hurriedly ran back to my cave )


After working on them and finishing a few other things, I decided to make another patchwork quilt... out of fabric I already had in my stash this time.. I gave myself limitations.. I like to have perimeters when I am creating...  a few confines... I feel it makes one more inventive... besides I hate to waste anything... and we can always use a warm quilt instead of a bunch of fabric stuffed in a cupboard really being no use to anyone..

I looked at what I had and searched through some quilt pattern books, did a few sketches and went with this design... sort of a double 9-Patch... prints, plains and all pieced with varying shades and weights of white cottons... Initially when I was drawing up the pattern I did not have the border drawn in... that was added later when I was figuring placement of colours.. even still it evolved again.


 I'm trying to figure the placement here.   I laid a black piece of fabric on one side of my bed and a white piece on the other and began placing the little 3" blocks out on it... wondering  which way I liked best...   they each have a very different effect..  I took several pictures and studied them on the computer screen for a while too... of course I puzzled over this for quite a while and then I thought Why???.. I could always make another in the opposite manner sometime if I wished... and then I got on with it.. 

 the bigger 9-Patch blocks are beginning to be sewn together and placed again for "Judgement".

 Here I have all 7 rows of 7 blocks sewn together in strips. 

I have to say there were a few times I said to myself " what were you thinking???.. this thing is going to take everybodies eyes out".. and "now you have chopped up all this fabric and you wasted it all.. You! Wasted!!"  What could I do but carry on.... sort of like a traveler lost in the woods.. hoping I was going to come out the other side in a place I wanted to be... or even if I was going to make it out of the woods at all. 

These are the strips/sashes with the red squares centered to fit where the corners of the blocks meet.
In the background you can see some of the sewing machines I have been collecting during the last year. Kenmore, White and Singer.

 I pieced the entire quilt on a 1936 Singer Treadle.. it would go as slow as I wanted no problem... as I was piecing carefully to make sure all the seams were sewed in the right direction and that the seams met where they were suppose to.  I LOVE this machine. 

 that little light clamped on the back of the machine was pitiful to see with tho... The bigger clamp on lamp in the last picture above was much better and more flexible.. Probably I just have to figure how to replace the little old sewing machine lightbulb... so long as they still make these kind.

I'm sewing the long black and red strips in now between every row.
Look at the beautiful design that Singer incorporated into the end cover-plate.. so lovely and the metal is as good as the day it was made.  It gives me pleasure every time I see the machine even when I'm not using it.

The blocks and windowpane sashes are all sewed together... but I really feel it needs a border.. something to pull it all together.  Yes even at this point I kept saying to myself.. What Have you done.. this is so bright, it is like a carnival.  Hense the name of the quilt came to be known as  "Carnival".

 well sometimes more of the same works, so I cut narrow strips of some gold cotton.. I barely had enough... I used every last piece of it... each strip was only 3/4" wide and when the seams were taken away the gold only measured 1/4".  But being a very bright color.. that was all that was needed. then a bit wider red border to tie into the small corner pieces and a 3 1/2" black edge.

The borders.

The finished top waiting to be quilted. Very bright isn't it?  kind of crazy bright... kind of "quit trying to hypnotize me" bright.... oh well, onward through the forest.

 I used a soft gold patterned sheet for the back... but to make it big enough I had to pick out the wide hem.

Here she is going into the frames with the backing below and the lofty fiberfill in the middle.. I did it lying on the floor for this part of the process this time.. It was so big, 84" x 84" sq., my old frames would hardly hold it.. I don't have it stretched in this pic, I'm just pinning and basting it in place. 
 I'll stop here for now and show some of the quilting and the finished work in a future post.. Hope you had your sunglasses on.

During the piecing a cold spell of weather hit and this snow covered view to the west greeted me one morning.
It's gone now but it was pretty then.

till next time...

Wishing you All a Most Wonderful 2015 !

Tuesday, December 09, 2014

Some Days Are Like This


...  the little dots in the water are fishing boats from our village harbour and beyond, lobstering in the Bay of Fundy ... high tide ... photo from my studio window..

I am grateful.

Gwen Buchanan at Desideratum Art and Jewelry in St. Martins, New Brunswick, Canada

Tuesday, December 02, 2014

Cat # 7 and a New Pair of Embellishments


Earrings from the Desideratum Art Jewelry "Embellishments"  series.

Sketch of fluffy cat from my sketchbook ... pen, ink, watercolour washes, approx. 6" x 8"

A few interestings things about Cat's Eyes:
 A cat's eye is about 6 times more sensitive to light than our own.  They cannot literally see in the dark but they can see when it is too dark for us to see.  Their eye has a pupil that can open wide to let in all available light, including starlight and they have a special light reflecting layer behind the retina, that works as an image intensifier for night vision.  But it takes time, up to an hour, for a cat's eye to adjust completely from daylight to nightlight... it can worry a cat that is suddenly put out of a well lit home at night...  an outside light helps their eyes adjust. 

The lens of a cat's eye has a fixed focal length, like a camera... objects between 6' and 20' are the clearest... anything closer than 30" is probably blurred. It is thought, their peripheral field of view is better than right straight ahead.

A special feature of cat vision is the way the smallest flicker of movement catches their attention and they see these tiny movements best in low light conditions and hardly at all in bright light.
Colour does not seem to be very important to cats.
 
  Sterling Silver and Copper with a mix of mauve and blue-green glass and african turquoise, semi-precious stones.

 Segments are linked together with jump rings, so there is lots of movement.

One of a Kind... not to be reproduced.. although I can make a somewhat similar pair with different coloured stones at an individuals request... and it will be One of a Kind too..

  4" from top of earwire to bottom of earring.


 If interested in ordering, they are identified as Embellishent D #1.
Price $50.


...created by me at Desideratum Art and Jewelry studio, St. Martins, New Brunswick

*oh I just have to add this cool and unusual sunrise spread across the Bay of Fundy from yesterday morning ... of course it was way more amazing in real life... quite a perk after the gray days we had.  Cheers All!

Sunday, November 16, 2014

Finishing the Wild Goose Chase Quilt - The Binding


Part 3:  Done!!  I am happy to report that I finished the Wild Goose Chase Quilt on Oct.8, 2014 but I have just finally had a chance to post about it now... 
I was busy working on a number of Christmas orders for our Art Jewelry from lovely shops and customers.  Thank you All...  very much appreciated!

  I really enjoyed making this Quilt. By the time I was done, it was like an old friend. After all, we spent a lot of time together.
 ***
For anyone who would like to see the beginning phases of making this, here are the links to the first two posts on it..
***
... and Here are a few pics of the steps in finishing it.
  This was the day I put the last quilting stitches in.

 The clamps and end frames are off.

 Time to unroll it and take the basting stitches out of the cloth along the long side frames.

 Ready to unroll and reveal everything that was all wound around them for the last few months.
The backing just happened to be larger than the front so now that needs to be trimmed to size... and saved of course. 
I'm sure it will find its way into another quilt one day.

 I'm using red for the binding, so I laid it out and measured 2'' strips and cut them out.

  The strips were all sewn together into one very long strip with a bias seam... then trimmed to about 1/4".
.. this keeps the bulk to a minimum and the binding smooth.
...the seams were pressed open... then the entire length of about 30 feet was folded in half width-wise and pressed.

 I used the 1977 Kenmore Convertible Freearm sewing machine (the one I used to make the shirts for Max) to do the stitching around the border of the quilt. 
It was quite a bit to manuever the whole quilt but I was only going around the edge so it wasn't too bad.

 I lined the binding up with the edges of the quilt fabric layers and used about a 3/8" seam and stitched through everything.

 ...extra binding was left at the corners to allow for mitering the corner.

... had no problems with the stitching... all went smoothly.


I worked late in the studio to finish this step before I went to bed. I wanted to be ready for a fresh start in the morning.

And what a morning it was when I awoke to this dramatic sunrise out over the Bay... 
What Beauty!  I love these sunrises!!!
*that lump on the horizon is the Isle of Haute about 24 miles away*

...then a while later the sky turned to this delicate combination.  Still so beautiful... but so different... in such a short period of time.
It is the "getting up early" reward.

After that exquisite distraction, back to business... It will be finished today.
... here I am trimming the edges again, to get ready to fold over the doubled layer of binding. The doubled layer makes a much longer lasting binding and easier and faster to hem too, as there is no raw edge to turn in.

 I folded the binding over to the back and used a blind hemstitch to work the edge.

 All Done.

Here it is displayed on an antique double bed given to Max by our friends, Mary and George, when they moved.  I like the way they look together. 
Hope Max enjoys it for a long time.


***
Recently I was tagged by my friend Janice at Dancing with Sunflowers  to do a post on What I am working on and How do I create ... generally What is your creative process. Well since I am a very casual person, not formal at all,  I just go with the flow. I like to envision one art form translated into other mediums and try to understand and figure out how to accomplish it. I like the challenge of creating something from scratch.. and I do love functionality.  But being so informal I will use this post as my answer. Please visit my friend Janice, a very accomplished artist and needleworker and much more.

All for now from the Desideratum Art Studio up on the bluff in St. Martins, NB.