I love sewing and I had this length of fabric in the stash cupboard.
I wanted to make my son Max a shirt but I didn't have a pattern. I took one of his shirts that fit him comfortably, checked YouTube and got the basics of making a tissue paper pattern.
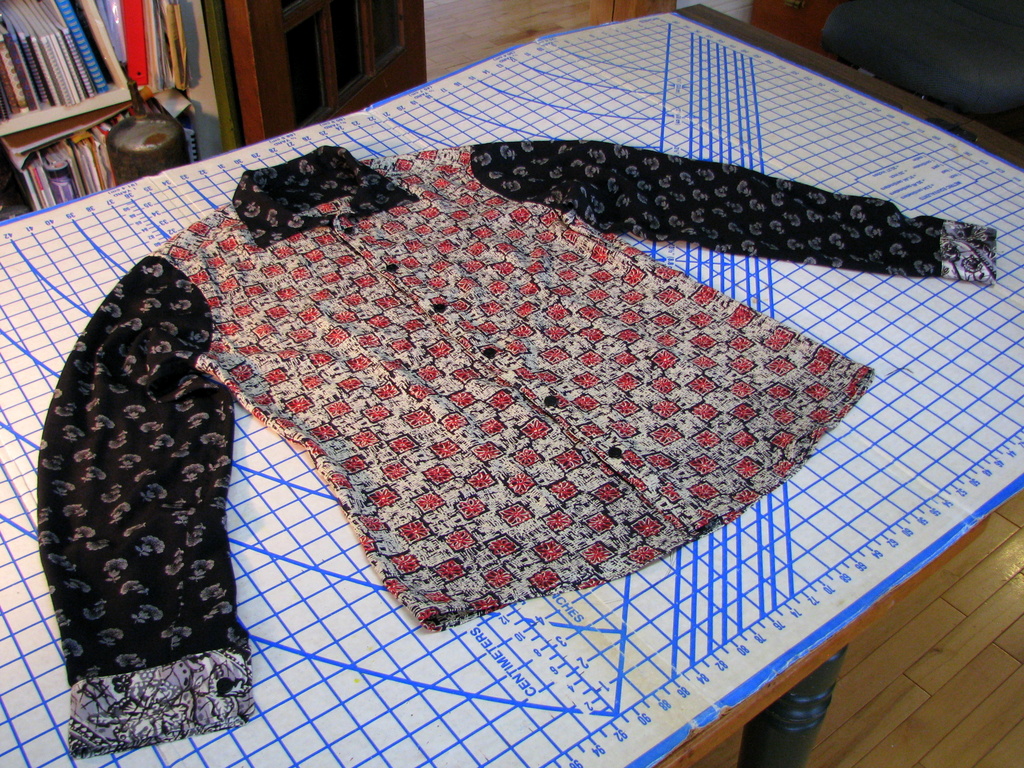
You just lay out the shirt you already have on tissue paper on a pinable surface, carefully isolating each section of the shirt.. the sleeves, cuff, yoke, front, back and facings on tissue paper...then use pins to map it out around the seams... then draw along the dots around the whole shape... pay attention to the straight of the grain... add seam allowances (5/8") and voila you have a pattern. Well it wasn't quite as fast as "Voila" but just stay with it and you will get a pattern. and once you have it you can make as many shirts as you want from it. I made two ... here's the first one.. the groovy one.
I forgot to take a picture of the actual process of making the paper pattern but here are the pieces pinned onto the fabric and cut out.
Here the pieces are turned over...
Max and I thought it would be cool to combine several colors and patterns in the same shirt... so why not have a little fun. The fabrics were quite fine and slippery, so the shirt will be very lightweight. The red and black print was a remnant from the fabric store. The black print is recycled fabric... so is the gray print used in the cuffs.
This is a 1977 Kenmore Convertible Freearm, model 158.19471, all mechanical, that I recently brought home (second hand... super good deal or I wouldn't have got it)...and after oiling and lint removing, it works amazingly. I highly recommend this model.
I wish I aged this well since 1977!
***I will do a post soon on my vintage sewing machine collection that sort of just happened over the last year. It's a long story... but I will post pictures of all the "girls" one of these days soon. Old sewing machines are the best!
This is the inside of the back, which was cut on the fold. It is a fitted shirt so there are two darts in the back to give it shape, kind of hard to see for the busyness of the pattern.
We made the yoke of the black print fabric on the inside...
and the same color fabric on the outside of the yoke. I love lined yokes and they finish a shirt well and make the shoulder stronger.... and since the whole shirt is hanging from the shoulder, you want it strong.
That is the collar at the top of the picture.
I like clothing that is finished on the inside as cleanly as it is on the outside so I made Flat Fell Seams on all the seams. It makes sewing clothing by hand that much more worthwhile. I LOVE flat-fell seams. They take a little longer to do but you will never regret the durability, strength and feel they add to a garment.... and they look nice.
The above pic is a close up of top stitching the back/yoke seam. If the shirt was on inside-out you would never know except for the buttons.
Here it is finished with the buttonholes and buttons.
Here is Max giving it a model. It fit great and he really liked it.
Since this shirt turned out, we found another length of fabric and cut out another one.
This time the contrasting color will just be on the inside.
This time I made the front button facing in a contrasting color and so a glimpse of it is seen when the collar folds down.
The fabric has a sheen so it was difficult to get the same lighting in each shot when I took the pictures. I'm marking for the buttonholes in the bottom right pic.
The upper left shot is the cut made for the sleeve placket.. then the finished sleeve with attached cuff. The machine does pretty good buttonholes. I was pleased with it. There is a button on the placket of the sleeve too.
Doing the buttonholes always makes me nervous as they run right up the front of the garment and if I wreck this last feature I have wrecked the whole shirt, so I always go carefully and slowly on this.. and sew with my fingers crossed and my teeth clenched a bit.
...using tailors chalk to mark the Buttonholes... it wipes right off with no staining.
All Done. I like it.
and incidentally, the second shirt went much quicker. I started it one afternoon and finished it the next... so it doesn't take long to sew a shirt.
I am going to look for more fabric in the cupboard... John needs a couple shirts too.
***Note:
Flat-Fell Seams (as it would take a while to describe a flat fell seam
I have linked to this bloggers step by step... great pics of the
method).
Thanks for visiting!
Gwen Buchanan at Desideratum Art Studio in St. Martins, New Brunswick, Canada.


